DNA vs. protein gel electrophoresis: What’s the difference?
…and how to use a DNA gel setup to run proteins

Analyzing DNA with agarose gel electrophoresis is becoming increasingly common in classrooms thanks to affordable, easy-to-use equipment (such as the blueGel™ electrophoresis system).
But DNA isn’t the only biomolecule you can run on a gel. Scientists often analyze proteins using gel electrophoresis as well. Most classrooms don’t have access to the equipment scientists use for protein gel electrophoresis, but you can use a typical agarose gel electrophoresis setup to run and visualize fluorescent proteins—without additional equipment or reagents.
In our BioBits® Protein Structure and Function: Protein Gel Electrophoresis Extension Activity, we outline how you can modify your existing DNA gel electrophoresis protocol to easily run proteins on an agarose gel. For information on running a modified protocol in your classroom, refer to the activity guide linked above. If you want more scientific background on how those modifications work, read on.
Nucleic acid vs. protein gel electrophoresis
The basic principles involved in nucleic acid and protein gel electrophoresis are the same: an electric field causes the movement of charged molecules through a gel matrix. However, there are a few key differences that make the type of protein gels that scientists use more complex:
- Protein gels typically use polyacrylamide instead of agarose. Proteins are typically much smaller than DNA samples. To separate proteins, scientists use gels made out of polyacrylamide because the gel has smaller pores than an agarose gel.
- Polyacrylamide gels are more challenging to prepare than agarose gels. Due to the chemical properties of polyacrylamide, protein gels are cast between two vertical glass plates. This process is more complicated than preparing agarose gels. Its chemical properties also make polyacrylamide relatively toxic compared to agarose.
- Proteins are typically treated to disrupt protein structure and impart a uniform negative charge before running on a gel. Proteins are typically denatured so that the proteins are all linear strings of amino acids. Proteins are also treated with SDS, a detergent that gives the protein a uniform negative charge, overwhelming any small charge that the protein may have had originally. In contrast, DNA is already a linear molecule with a uniform negative charge.
- Visualization of proteins on a gel can be more complex than visualizing DNA. DNA stains are usually added directly to agarose gels and typically fluoresce under blue or UV light. This allows us to immediately see the DNA bands brightly and clearly. On the other hand, visualizing proteins requires techniques that can be difficult for students to interpret (like Coomassie Blue stains) or need additional expensive equipment and reagents (like Western blotting).
In short, protein gel electrophoresis is more time-intensive and requires specialized equipment and reagents. But generally speaking, as long as a protein has a net charge, it will migrate through an agarose gel, allowing you to use the tools and reagents you likely already have in your classroom. The only remaining difficulty is finding a fast and simple way to visualize your proteins.
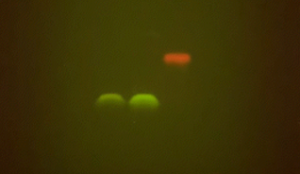
As outlined in the BioBits Protein Structure and Function: Protein Gel Electrophoresis Extension Activity, the key to being able to easily visualize proteins on an agarose gel without special reagents is to examine fluorescent proteins. Fluorescent proteins emit light when exposed to certain wavelengths of light, such as UV or blue light, so you can use the same illuminator used to visualize DNA to visualize fluorescent proteins. Because we’re not denaturing these fluorescent proteins, they will maintain their fluorescent function and can be seen on your gel.
And there you have it – a way of running proteins on a gel without all the expensive equipment and complicated protocols!


