How to design PCR primers
This blog post is the second in 4-part series on PCR primers. Elsewhere on our blog, you can find posts on understanding PCR primers, ordering primers, and storing and using primers.
Our PCR-based Learning Labs™ include primers that we have designed and optimized for specific target genes. But users often wonder exactly how we did that, or they may be interested in designing primers for their own experiments targeting other genes. This article will help you get better at PCR primer design.
Guidelines for good PCR primer design
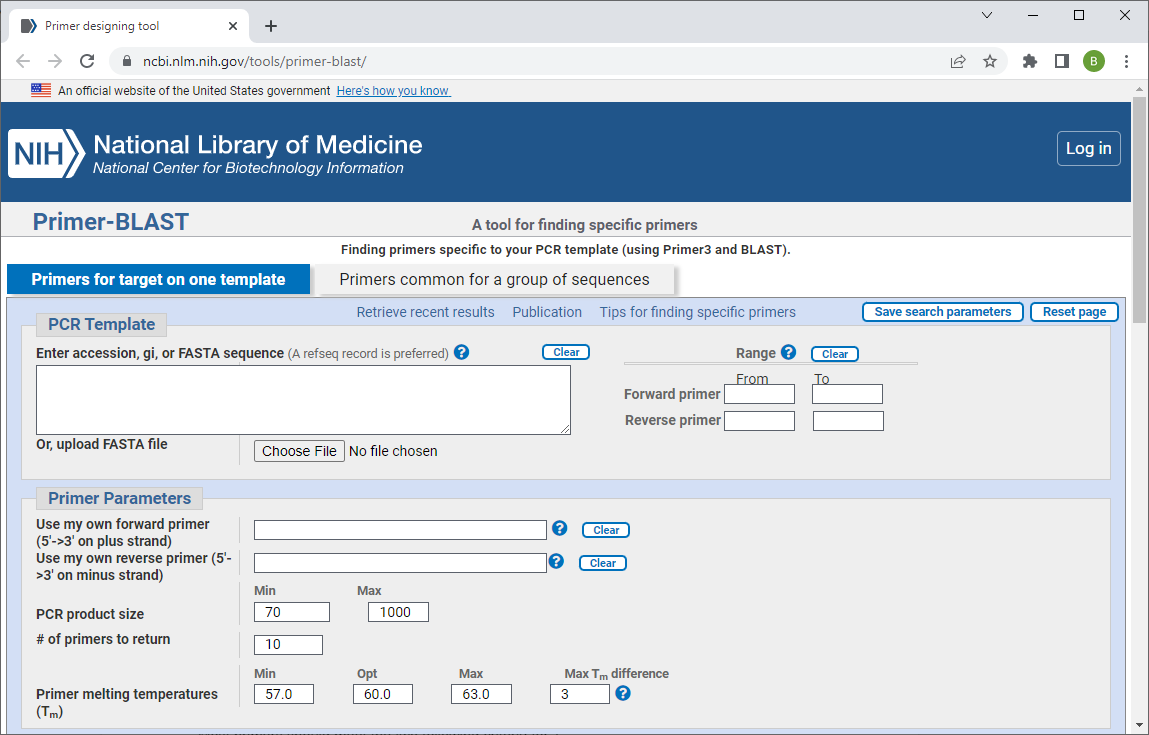
For a PCR experiment to have a higher chance of success, PCR primers are often designed so they adhere to some basic parameters. Some people design primers using primer design software (e.g., Primer BLAST or SnapGene), but many others design primers manually just following basic primer design rules that are easy to check by hand.
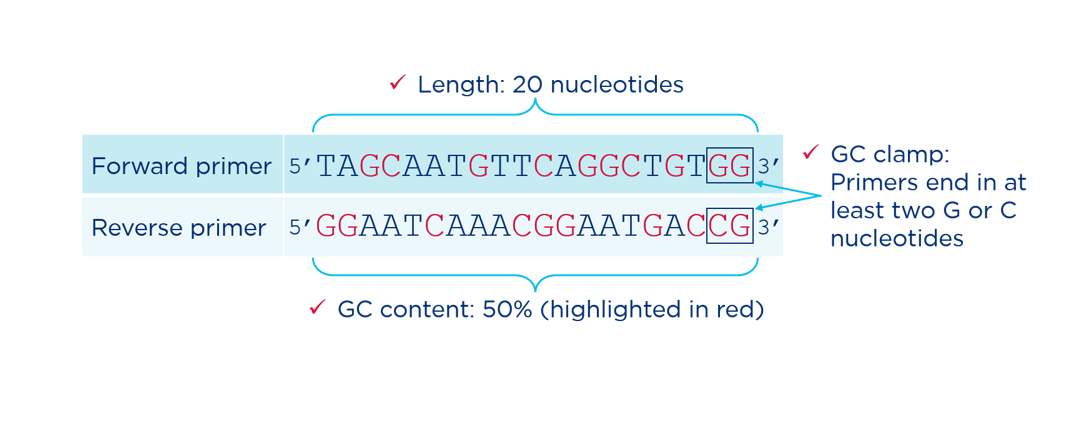
Length between 18-25 bases: Primers should typically be between about 18 and 25 base pairs long.
~50% GC content: The relative GC and AT content is one of the primary determinants of melting temperature (Tm) and therefore annealing temperature. Primers should have a GC content between 40% and 60%. More GC pairs and the Tm will be higher. Fewer GC pairs and the Tm will be lower.
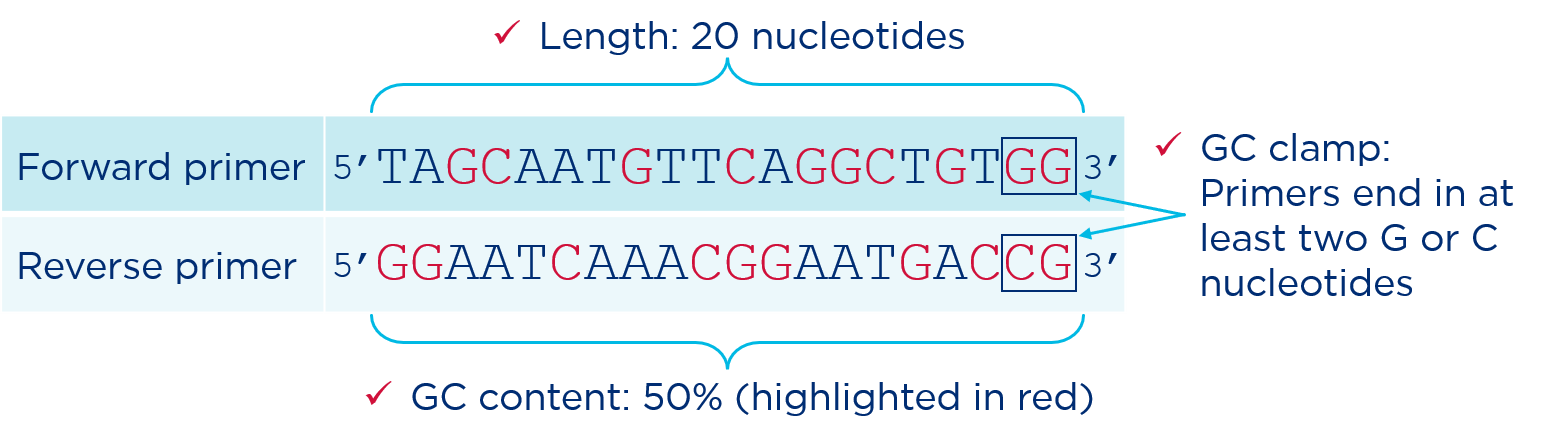
GC clamp at the 3′ end: Whenever possible, the last two bases at the 3’ end of a primer should be a combination of Cs and Gs. GC pairs form three hydrogen bonds, compared to just two hydrogen bonds formed by AT pairs. The three bonds between C and G at the end of a primer create a more stable starting point for Taq polymerase to begin copying.
Melting temperature (Tm): Tm is defined as the temperature at which 50% of the primers will be bound to the template DNA and 50% will remain single stranded. Tm is important because it determines the temperature for the annealing stage of the PCR. The precise annealing temperature that works best for a PCR is usually about 5 °C below the Tm of the primers. Tm depends on a number of technical factors and is best calculated using software (such as the Tm calculator from NEB). Most primers should meet the two following criteria for Tm:
- Tm should be between 55 and 65 °C.
- The Tm of forward and reverse primers should be within five degrees of each other. The closer, the better.
Now, if this seems like a lot to handle, just consider that by simply following the other guidelines in this article about primer length and GC content, the Tm will naturally fall within the acceptable range!
Other things to watch out for: The following considerations are often checked for by primer design software, but some are easy enough to see by eye.
- Avoid sequences that may bind to themselves. For example, a stretch of ATATAT in a primer is going to make it more likely that the primers will bind to each other rather than the DNA template.
- Avoid strings of the same nucleotide in a row. Stretches of repeated nucleotides can cause mispriming.
- Avoid primers that may bind teach other. If your primer pairs have sections that are complementary, they may bind to each other instead of the target sequence.
- Avoid primers that may form secondary structures such as a hairpin.
- Make sure your primers won’t bind other places in the genome of the organism you are working with. If you are working with humans or a common lab organism, some primer design software will test to see if it is likely that you will amplify non-target DNA.
Just be prepared that even well-designed primers don’t always work exactly as expected—so be prepared to optimize your PCR. Sometimes, the real secret to designing good primers is just to design several of them and then test which pairs work the best.
Once you’ve designed your primers, how do you get them to your lab? Our next blog post will tell you how to order PCR primers.
Contributed by miniPCR bio curriculum director Bruce Bryan