Bandit™ STEM Electrophoresis Kit assembly instructions
Use these instructions to assemble your Bandit™ kit. The Bandit™ STEM Electrophoresis Kit allows students to build a working gel electrophoresis apparatus. Then, they use their fully functioning system to run an electrophoresis lab. Learn electrophoresis from the inside out!
Note: To complete the following steps, you will need both the Bandit™ STEM Electrophoresis Kit (QP-1400-01) and a dye electrophoresis Learning Lab™ (sold separately).
Materials needed
Materials listed below are included in Bandit™ kit unless otherwise indicated.
- USB-C cable
- Electrode cable
- Bandit™ circuit controller
- Electrode wire (20 cm needed per Electrodam™)
- Pair of Electrodams™
- Comb supports (2)
- Comb
- Buffer chamber
- USB-C compatible power source (not included in Bandit™ kit; supplied by user or available at minipcr.com)
- TBE buffer (not included in Bandit™ kit; sold with dye electrophoresis Learning Labs™)
- Agarose Tabs™ or agarose powder (not included in Bandit™ kit; sold with dye electrophoresis Learning Labs™)
- Experimental samples (not included in Bandit™ kit; sold with dye electrophoresis Learning Labs™)
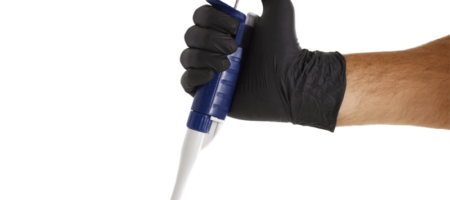
- Micropipette (not included in Bandit™ kit; supplied by user or available at minipcr.com)
Prepare Bandit™ for gel casting (before or during class period)
Note:
- Protective gloves and eyewear should be worn for the entirety of this experiment.
- Gels can be prepared up to five days ahead of time and stored at room temperature.
- To store gels, leave the gel in the buffer chamber and wrap the chamber in plastic wrap or place it in an airtight container.
Prepare 1X TBE buffer (to be completed by teacher in advance)
-
- Prepare 60 ml of buffer for every Bandit™ electrophoresis system you plan to use.
- 30 ml of the buffer will be used to make your gel and 30 ml will be used as running buffer.
- TBE buffer is often provided as liquid concentrate or powder.
- Follow manufacturer’s instructions to prepare 1X TBE buffer solution.
Set up the Bandit™ buffer chamber and Electrodams™ for gel casting
1. Place the Electrodams™ at the ends of the buffer chamber
- The Electrodams™ must be inserted in the correct orientation, as shown below.
- The short side of the Electrodams™ should sit flat against the bottom of the buffer chamber and the tall side should face the center of the buffer chamber.
- Be sure that the Electrodams™ sit tightly against the bottom of the buffer chamber.
2. Place the comb supports over the sidewalls of the buffer chamber
3. Place the comb in the buffer chamber, resting over the comb supports
- The comb should be straight (parallel with the back of the buffer chamber).
- For most introductory applications, the white side of the comb with six teeth should be facing down. The comb orientation will be specified in the lab guide for your Learning Lab™ of choice.
- For most applications, the comb should be placed approximately 1 cm from the black Electrodam™. The comb placement will be specified in the lab guide for your Learning Lab™ of choice.
Prepare the agarose
1. Prepare an agarose solution
- Obtain a heat-resistant container such as a glass Erlenmeyer flask or beaker that is at least three times the volume you wish to add.
- Gels can be prepared with Agarose Tabs™ or agarose powder.
- If using Agarose Tabs™:
- Combine 30 ml room temperature 1X TBE buffer and one Agarose Tabs™ for each gel you plan to pour.
- Allow the tabs to soak until they fully disintegrate (this could take a few minutes).
- Swirl the flask or beaker to ensure the tabs have fully disintegrated before heating.
- If using Agarose Tabs™:
-
- If using agarose powder:
- Combine 30 ml 1X TBE buffer and 0.5 g agarose powder for each gel you plan to pour.
- Swirl the flask or beaker until reagents are well mixed.
- If using agarose powder:
2. Heat solution
- Expect to heat for about 60 seconds per 30 ml of liquid in a standard microwave.
- Heat until the solution boils and continue until agarose is dissolved and the solution becomes fully transparent.
- Caution: The solution may boil over the top of some containers. The solution will be very hot.
3. Pour the agarose solution into the prepared Bandit™
- The agarose solution should cover the bottom of the gel tray and the bottom 3 mm of the comb (roughly the bottom 1/3 of the comb).
- Note: If the lab you are performing uses colored dyes, there is no need to add DNA stain.
4. Allow gel to solidify completely
- Gels will typically be ready in about 10 minutes.
- Gel is ready when cool and firm to the touch.
- Gels can be stored in an airtight container at room temperature for up to five days before use.
Prepare Bandit™ for gel run
1. Remove the comb, comb supports, and Electrodams™ by pulling firmly upwards
2. Prepare the electrodes
- Note: The electrode wire can remain attached to the Electrodams™ for several uses. If the electrode wires are already in place, proceed to step 3.
- If the Electrodams™ do not already have wire attached, cut from the included spool two pieces of electrode wire each approximately 20 cm (8 inches) in length.
- Thread one Electrodam™
- Starting from the tall side of the Electrodam™ with a channel present, thread the wire through one of the small holes. You only need about 2 cm of wire to come through on the other side.
- Flip the Electrodam™ over. Twist the short free end of the wire that you just threaded through the hole around the longer piece of the wire to prevent it from slipping back through the hole.
- Flip the Electrodam™ back over so you are looking at the side with the channel again. Thread the loose end of the wire through the small hole on the other side of the Electrodam™
- Slowly pull the long free end of the wire until it is taut and the electrode wire sits flush in the channel.
-
- Repeat for the other Electrodam™, but thread the electrode wire from the opposite side so that the long free ends of the electrode wires extend in opposite directions.
3. Insert the Electrodams™
- Place the black Electrodam™ in the buffer chamber at the end closest to the wells of the gel.
- Place the red Electrodam™ at the other end of the buffer chamber, away from the wells of the gel.
- The Electrodams™ should be inserted with the electrode channel near the bottom of the buffer chamber, facing the gel.
- Make sure that the long free ends of the electrodes are accessible.
4. Connect the electrodes
- Connect the black alligator clip to the free electrode wire coming out of the black Electrodam™.
- Connect the red alligator clip to the free electrode wire coming out of the red Electrodam™.
- It may help to wrap the electrode wires around the alligator clips to ensure good contact.
Run the gel
1. Add 30 ml of 1X TBE electrophoresis buffer
- The buffer should just cover the gel and fill the wells, in addition to the spaces between the Electrodams™ and the gel.
- Ensure that there are no air bubbles in the wells (shake the gel gently if bubbles need to be dislodged).
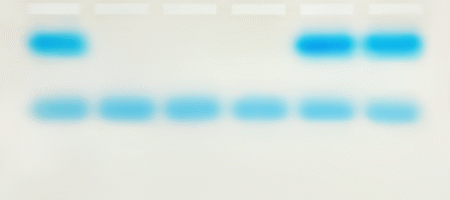
2. Use a micropipette to load samples onto the gel in the order specified in the lab guide for your Learning Lab™ of choice
3. Connect the power cables
- Plug the wire connected to the alligator clips into the round port on the right side of the Bandit™ circuit controller
- Plug the USB-C cord into the USB-C port on the left side of the Bandit™ circuit controller.
- Plug the other end of the USB-C cord into your power source of choice.
- Note: USB-C power source is provided by the user
- A small light on the right side of the Bandit™ circuit controller will illuminate to indicate that the power is on.
- Look for bubbles on the electrode wires to verify that all the wires are connected and current is flowing.
4. Conduct electrophoresis for 15-25 minutes
- The run time will be specified in the lab guide of your Learning Lab™ of choice.
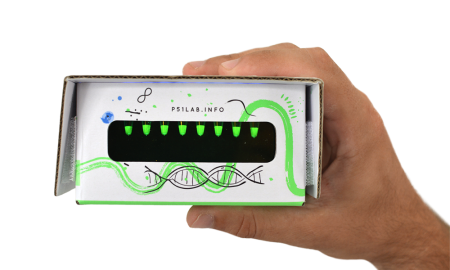
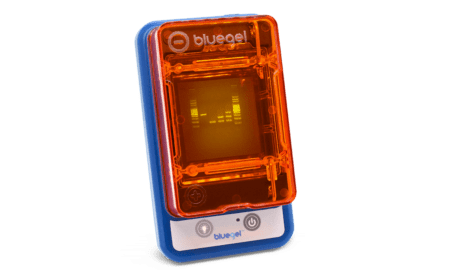
Optional: Add DNA visualization with the Viewit™ Illumination Kit
Add-on to the Bandit system for visualization of DNA separation in real time
- With the addition of the Viewit™ illumination kit, you can now visualize DNA samples in real time during gel electrophoresis using the Bandit™ STEM electrophoresis kit.
- The Bandit™ + Viewit™ combination is the perfect partner for DNA electrophoresis Learning Labs™.
Note for Viewit users: A DNA stain must be included in your agarose gel
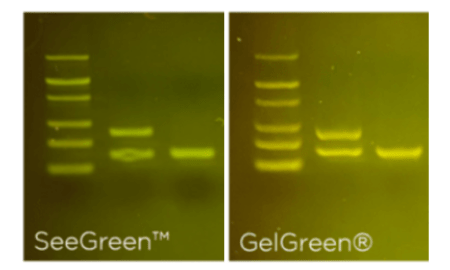
- The video below shows how to cast an electrophoresis gel using All-in-One Agarose Tabs™
- These convenient tablets come ready to use with pre-measured agarose, TBE, and SeeGreen™ or GelGreen DNA stain, to enable DNA visualization.